KenKen guide
How to play and solve KenKen
The rules fit in four lines. Solving takes a handful of moves, and below they are shown on a real puzzle from this page, one step at a time, with the reason for every number.
How to play KenKen
- Fill the grid with the numbers 1 to the grid size: 1 to 4 on a 4×4, 1 to 7 on a 7×7.
- Each row and each column uses every number once, as in Sudoku.
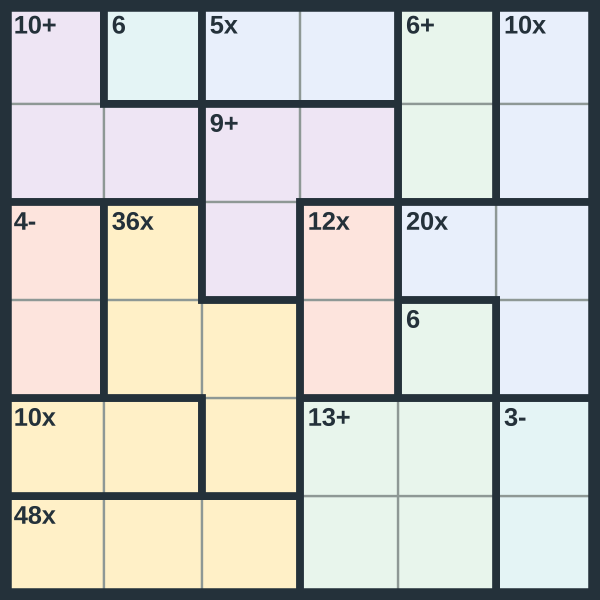
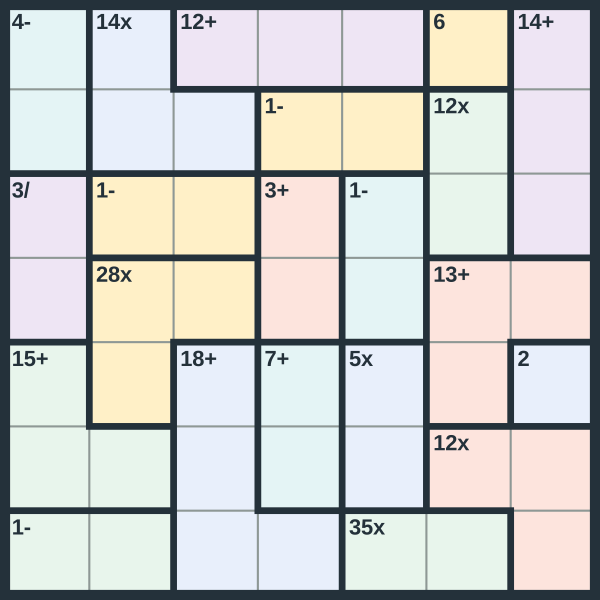
- The heavy outlines are cages. The numbers in a cage must make its target with its sign: 7+ means they add up to 7.
- Order does not matter for − and ÷. A 2− cage holding 1 and 3 works either way round.
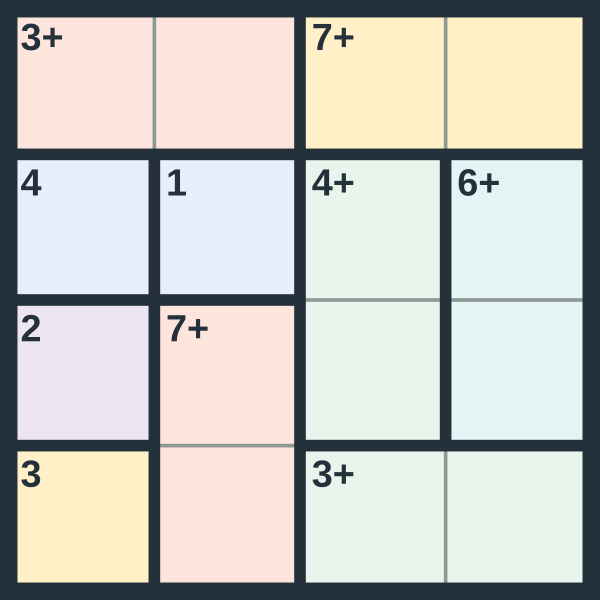
A cage with one square and no sign simply tells you the number. Here is a 4×4 from this page's builder, and its answer.
How to solve a KenKen, step by step
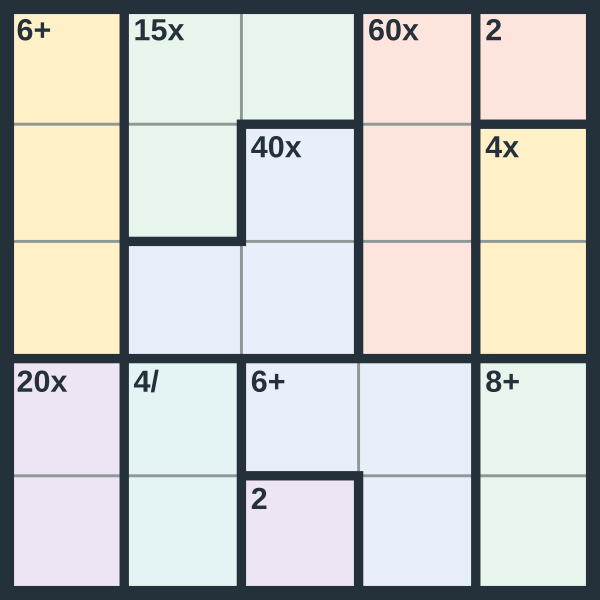
This is a Medium 5×5 made by this page's generator, solved with four moves you can make on paper. Each step below is computed from the puzzle, not written by hand, so the reasons are exactly what the grid allows. Highlighted squares are the ones that step fills.
Step 1. A cage with one square and no sign is a given: its number is the answer. This puzzle has 4, so write in 1, 4, 2 and 2 first.
Step 2. A two-square 4+ cage can only be 1 and 3 on a 5×5 grid. Column 2 already has a 1, so the left square of the 4+ cage is 1 and the right is 3.
Step 3. The square at row 4, column 2 already sees 1, 2, 3 and 4 in its row and column, so it can only be 5.
Step 4. Column 2 now has 1, 2, 3 and 5, so its empty square is 4.
Step 5. The 60× cage already has 4 and 5, so its last square is 60 ÷ 4 ÷ 5 = 3.
Step 6. A two-square 15× cage can only be 3 and 5 on a 5×5 grid. Column 3 already has a 3, so the left square of the 15× cage is 5 and the right is 3.
The other 12 steps use the same moves: last number in a row or column (6), a cage's last square (2), a two-square cage with one possible pair (2) and a square with only one number left (2). Try them on the grid before you open the list.
Show steps 7 to 18
- Row 2 now has 1, 2, 3 and 5, so its empty square is 4.
- The 2− cage has a 4, so its other square is 4 plus or minus 2. Here 4 + 2 is more than 5, so it is 2.
- A two-square 8+ cage can only be 3 and 5 on a 5×5 grid. Row 4 already has a 5, so the top square of the 8+ cage is 3 and the bottom is 5.
- The square at row 1, column 3 already sees 1, 3, 4 and 5 in its row and column, so it can only be 2.
- Column 3 now has 2, 3, 4 and 5, so its empty square is 1.
- The 3− cage has a 1, so its other square is 1 plus or minus 3. Here 1 − 3 is less than 1, so it is 4.
- Row 5 now has 1, 2, 4 and 5, so its empty square is 3.
- The square at row 1, column 4 already sees 1, 2, 3 and 4 in its row and column, so it can only be 5.
- Row 1 now has 1, 2, 3 and 5, so its empty square is 4.
- A two-square 5÷ cage can only be 1 and 5 on a 5×5 grid. Column 4 already has a 5, so the left square of the 5÷ cage is 1 and the right is 5.
- Column 4 now has 1, 3, 4 and 5, so its empty square is 2.
- Row 4 now has 2, 3, 4 and 5, so its empty square is 1.
Three mistakes that cost the most time
- Chasing a cage and forgetting the row. 3 and 5 make 8+, but not in a cage whose row already has a 5.
- Reading − and ÷ in one direction. 2÷ can be 4 over 2 or 2 over 4. The order inside the cage is free.
- Assuming a cage never repeats. In an L-shaped cage, the two ends sit in different rows and columns, so they can hold the same number. Only squares that share a row or column must differ.
KenKen cage combinations: the cages with only one answer
The fastest start on any KenKen is a two-square cage whose target can only be made one way. These are all of them, worked out for every grid size this page prints. A 7+ cage on a 4×4 must be 3 and 4; the same 7+ on a 6×6 could be 1 and 6, 2 and 5, or 3 and 4, which is why bigger grids start slower.
| Grid | + | − | × | ÷ |
|---|---|---|---|---|
| 4×4 | 3+ = 1, 24+ = 1, 36+ = 2, 47+ = 3, 4 | 3− = 1, 4 | 2× = 1, 23× = 1, 34× = 1, 46× = 2, 38× = 2, 412× = 3, 4 | 3÷ = 1, 34÷ = 1, 4 |
| 5×5 | 3+ = 1, 24+ = 1, 38+ = 3, 59+ = 4, 5 | 4− = 1, 5 | 2× = 1, 23× = 1, 34× = 1, 45× = 1, 56× = 2, 38× = 2, 410× = 2, 512× = 3, 415× = 3, 520× = 4, 5 | 3÷ = 1, 34÷ = 1, 45÷ = 1, 5 |
| 6×6 | 3+ = 1, 24+ = 1, 310+ = 4, 611+ = 5, 6 | 5− = 1, 6 | 2× = 1, 23× = 1, 34× = 1, 45× = 1, 58× = 2, 410× = 2, 515× = 3, 518× = 3, 620× = 4, 524× = 4, 630× = 5, 6 | 4÷ = 1, 45÷ = 1, 56÷ = 1, 6 |
| 7×7 | 3+ = 1, 24+ = 1, 312+ = 5, 713+ = 6, 7 | 6− = 1, 7 | 2× = 1, 23× = 1, 34× = 1, 45× = 1, 57× = 1, 78× = 2, 410× = 2, 514× = 2, 715× = 3, 518× = 3, 620× = 4, 521× = 3, 724× = 4, 628× = 4, 730× = 5, 635× = 5, 742× = 6, 7 | 4÷ = 1, 45÷ = 1, 56÷ = 1, 67÷ = 1, 7 |
Two-square cages only, since two squares side by side always share a row or column and so always hold different numbers. Worked out for every pair of numbers on each grid when this page is built.
Which KenKen to print for each grade
Grid size decides how long a KenKen takes. The signs decide which arithmetic it practices, and that is the part to match to a class. This table shows the biggest sum and product clue that actually appeared across 36 sheets from this builder for each setting, 12 at each difficulty.
| Grid | Signs | Largest sum | Largest product |
|---|---|---|---|
| 4×4 | + only | 11 | — |
| 4×4 | + and − | 11 | — |
| 4×4 | + − × ÷ | 11 | 48 |
| 5×5 | + only | 15 | — |
| 5×5 | + and − | 16 | — |
| 5×5 | + − × ÷ | 15 | 120 |
| 6×6 | + only | 18 | — |
| 6×6 | + and − | 19 | — |
| 6×6 | + − × ÷ | 18 | 288 |
| 7×7 | + only | 22 | — |
| 7×7 | + and − | 25 | — |
| 7×7 | + − × ÷ | 25 | 840 |
36 generated sheets per row. Differences and quotients are left out: they can never be bigger than the largest number on the grid.
- + only and + and −. On a 4×4, 5×5 and 6×6, no sum passed 19, so these sheets sit inside the second grade standard for fluent adding and subtracting within 20 (Common Core 2.OA.B.2). On a 7×7, sums reach 25, a step past it. The 4×4 + only sheets are the gentlest: a first KenKen for younger children.
- All four signs on a 4×4. No product passed 48, so these fit the third grade standard for multiplying and dividing within 100 (Common Core 3.OA.C.7).
- All four signs on a 5×5. Most products stay within 100, but 2 of the 128 product cages measured went past it, up to 120. For a third grade class, where 3.OA.C.7 stops at 100, the 4×4 four-sign sheets stayed inside it.
- All four signs on a 6×6. Most products stay within 100, but 14 of the 189 product cages measured went past it, up to 288. For a third grade class, where 3.OA.C.7 stops at 100, the 4×4 four-sign sheets stayed inside it.
- All four signs on a 7×7. Most products stay within 100, but 35 of the 237 product cages measured went past it, up to 840. For a third grade class, where 3.OA.C.7 stops at 100, the 4×4 four-sign sheets stayed inside it.
Printing a class set
Color cages are easier to read, but a black-and-white sheet keeps the same heavy cage outlines and photocopies cleanly, so switch the PDF style to black and white for thirty copies. The terms of use let a teacher print and copy both the puzzles and the answer keys without asking.
KenKen, KenDoku, Calcudoku and Mathdoku
They are the same puzzle. KenKen was invented in 2004 by Tetsuya Miyamoto, a Japanese math teacher, as a way to build arithmetic and logic together. KenKen and KenDoku are trademarks of Nextoy, LLC, which is why many sites publish the same puzzle as Calcudoku or Mathdoku. Print Puzzles is not affiliated with Nextoy; every puzzle here is made by this site's own generator, and each one has exactly one answer, checked as it is made. More on that in how we make puzzle packs.