Futoshiki guide
How to play and solve Futoshiki
The rules fit in four lines. Solving takes a handful of moves you can make with a pencil, and below they are shown on a real puzzle from this page, one step at a time, with the reason for every number.
How to play Futoshiki
- Fill the grid with the numbers 1 to the grid size: 1 to 4 on a 4×4, 1 to 7 on a 7×7.
- Each row and each column uses every number once, as in Sudoku.
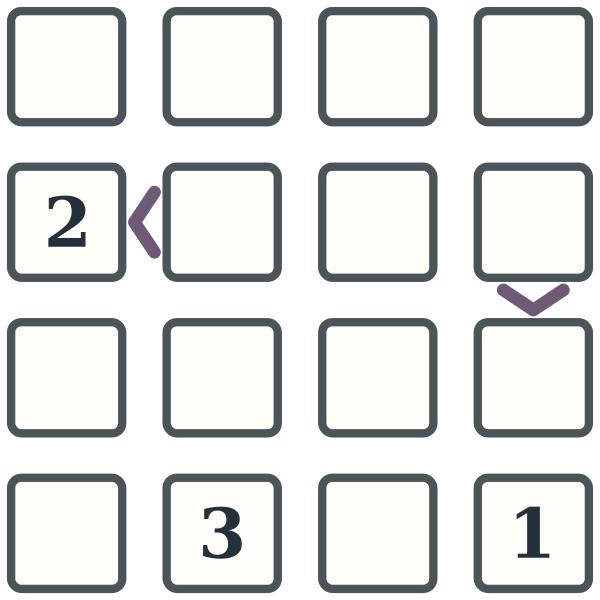
- Every sign between two squares must be true. The point of the sign aims at the smaller number, so 2 < 4 has its point at the 2.
- Signs between two rows work the same way, turned on their side: a point aimed up means the top square holds the smaller number.
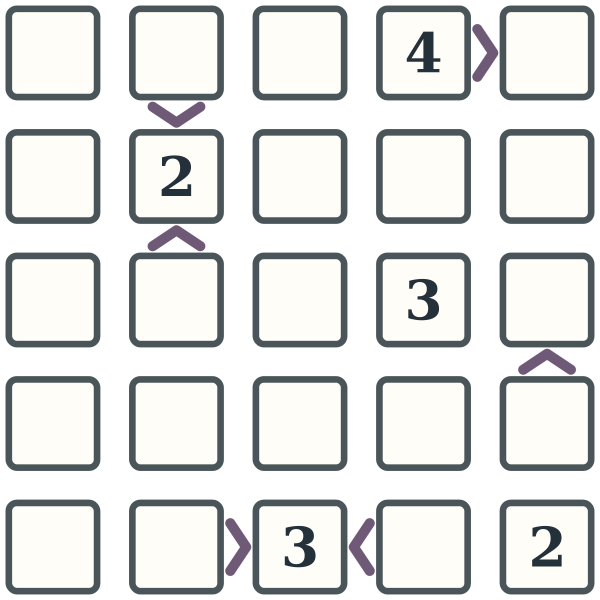
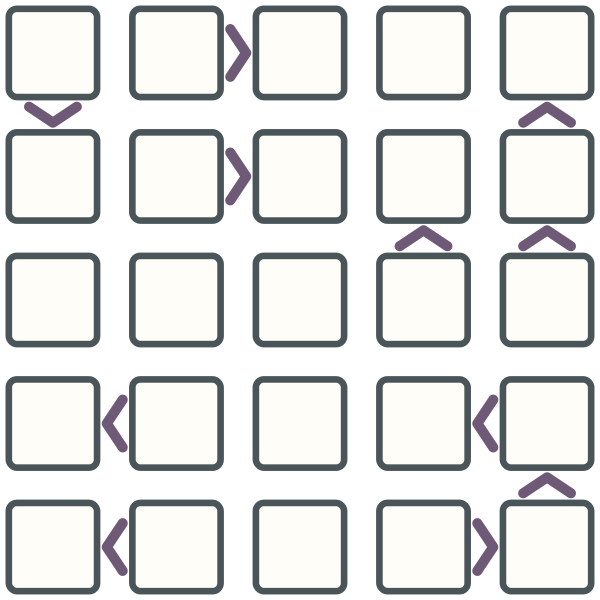
Futoshiki is Japanese for "inequality." Some puzzle apps call it Unequal. Greater Than Sudoku is a close relative: a 9×9 Sudoku with signs inside each box and few or no numbers printed. Here is a 4×4 from this page's builder, and its answer.
How to solve a Futoshiki, step by step
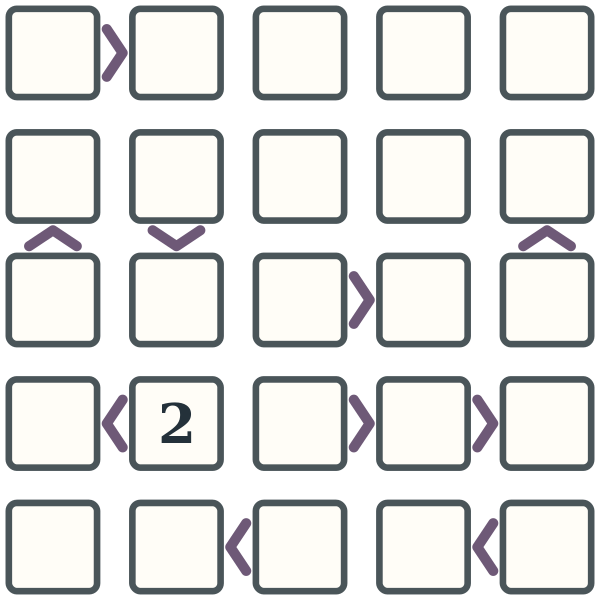
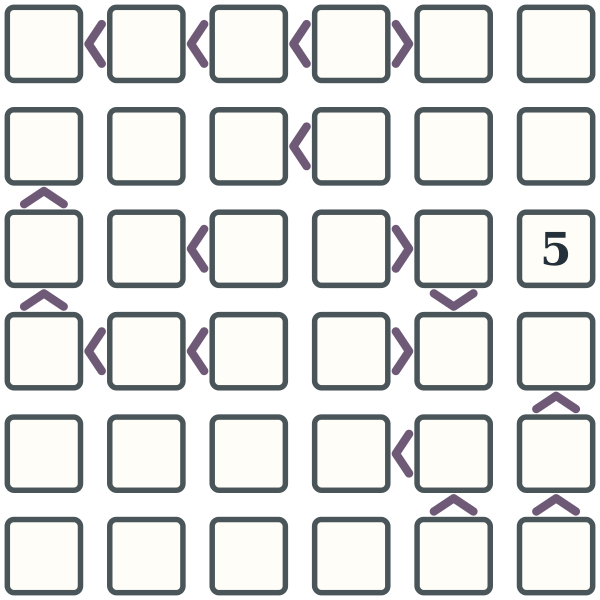
This is a Medium 5×5 made by this page's generator. Only 2 numbers are printed on it, and the 8 signs do the rest. Each step below is computed from the puzzle, not written by hand, so the reasons are exactly what the grid allows. Highlighted squares are the ones that step fills, and the numbers in green are the ones worked out so far.
Step 1. Two numbers are printed on this sheet. Everything else is worked out from them and the signs.
Step 2. The square at row 3, column 4: a run of 2 signs from the 4 makes it at most 2, and the sign beside it says it is larger than its neighbor, so it is at least 2. That leaves only 2.
Step 3. The square at row 3, column 5: its row and column already use 2 and 4, and the signs beside it put it between the 2 and the 4. That leaves only 3.
Step 4. The square at row 4, column 4: its row and column already use 2 and 4, and the sign beside it says it is smaller than the 2 next to it. That leaves only 1.
Step 5. In row 1, the 1 can only go in column 3: every other empty square in the row either has a 1 in its column or is kept away from 1 by its signs.
Step 6. The square at row 3, column 3: its row and column already use 1, 2 and 3, and the sign beside it says it is smaller than its neighbor, so it is at most 4. That leaves only 4.
Step 2 is the kind of move that sets a Medium apart from an Easy: it reads signs together as a run, not one at a time. Numbers along a run of signs pointing the same way keep going up, so each sign in the run moves the limit by one, even when no number is written beside the square.
The other 18 steps use the same moves: last number in a row or column (9), a square squeezed by the numbers and signs around it (6) and a number with only one place left in a line (3). Try them on the grid before you open the list.
Show steps 7 to 24
- The square at row 3, column 2: its row and column already use 2, 3 and 4, and the sign beside it says it is larger than the 4 next to it. That leaves only 5.
- Row 3 now has 2, 3, 4 and 5, so its empty square is 1.
- In row 2, the 1 can only go in column 5: every other empty square in the row either has a 1 in its column or is kept away from 1 by its signs.
- In row 5, the 1 can only go in column 2: every other empty square in the row already has a 1 in its column.
- In row 5, the 4 can only go in column 4: every other empty square in the row already has a 4 in its column.
- The square at row 1, column 4: its row and column already use 1, 2 and 4, and the sign beside it says it is smaller than its neighbor, so it is at most 4. That leaves only 3.
- Column 4 now has 1, 2, 3 and 4, so its empty square is 5.
- The square at row 1, column 5: its row and column already use 1, 3 and 4, and the sign beside it says it is larger than the 3 next to it. That leaves only 5.
- Column 5 now has 1, 3, 4 and 5, so its empty square is 2.
- Row 5 now has 1, 2, 3 and 4, so its empty square is 5.
- The square at row 1, column 1: its row and column already use 1, 3 and 5, and a run of 2 signs from the 1 makes it at least 3. That leaves only 4.
- Row 1 now has 1, 3, 4 and 5, so its empty square is 2.
- The square at row 2, column 1: its row and column already use 1, 3, 4 and 5. That leaves only 2.
- Column 1 now has 1, 2, 3 and 4, so its empty square is 5.
- The square at row 2, column 3: its row and column already use 1, 2, 4 and 5. That leaves only 3.
- Row 2 now has 1, 2, 3 and 5, so its empty square is 4.
- Column 2 now has 1, 2, 4 and 5, so its empty square is 3.
- Row 4 now has 1, 3, 4 and 5, so its empty square is 2.
Three mistakes that cost the most time
- Reading a sign backward. The point always aims at the smaller number, whichever way the sign faces. If it helps, the open end faces the bigger one.
- Missing the signs that point up and down. A sign between two rows ties those squares together exactly as firmly as one between two columns.
- Reading one sign at a time. Two signs pointing the same way through three squares mean the top of that run is at least 3, even when no number is anywhere near it.
Futoshiki strategies, from easiest to hardest
Every level uses the Sudoku basics: a row or column with one gap left, or a number with only one place to go. What separates the levels is the hardest move a sheet forces on top of those. Each puzzle here is graded by a solver that knows five moves, ordered by how much work they are to spot, and its level is the hardest move it could not finish without. How many numbers are printed has very little to do with it.
| Level | Hardest move it needs | What the move is | Numbers printed | Signs printed |
|---|---|---|---|---|
| Easy | Signs beside a filled cell | A sign next to a cell you have already filled: the neighbor is above or below that number. | 4.2 of 25 | 6.0 of 40 |
| Medium | Runs of signs | A run of signs pointing the same way. Three cells rising means the first is at most the size minus two. | 0.2 of 25 | 10.0 of 40 |
| Hard | Pairs and triples | Two cells in a row that can only hold the same two numbers, which locks those numbers out of the rest of the row. | 1.2 of 25 | 8.5 of 40 |
| Expert | Testing a candidate | Pencil a number in, follow it until it breaks a rule, and erase it knowing it cannot be right. | 1.0 of 25 | 9.0 of 40 |
Averages from 24 generated 5×5 sheets, 6 per level, measured when this page is built. Every one of them was also checked for a single answer by a brute-force search that shares none of the grading solver’s reasoning.
Notice what happens between Easy and Medium. An Easy sheet averages 4.2 numbers and 6.0 signs; a Medium averages 0.2 numbers and 10.0 signs. The bigger change is in how they solve. An Easy grid can be picked apart one sign at a time, and a Medium grid cannot: somewhere on it, a run of signs has to be read as a run before anything can be written down. Expert is the only level where you may need to pencil a number in, follow it, and erase it when it breaks a rule.
Which Futoshiki to print
Grid size decides how long a sheet takes. Difficulty decides which move it asks for, and that is the part to match to the person solving it. These are the settings we would start from.
| Who it is for | Settings | Why |
|---|---|---|
| First Futoshiki, ages 8 to 10 | 4×4, Easy, rules page on | Only the numbers 1 to 4, and no step needs more than one sign read at a time. Print the rules page once and keep it. |
| A class practicing < and > | 4×4 or 5×5, Easy, 2 per page, name and date on | The signs stop being something to copy and become the thing that solves the puzzle. |
| Middle school, a logic warm-up | 5×5, Medium, 4 puzzles, 2 per page | Medium is where runs of signs start to matter, so it rewards reasoning over trial and error. |
| Seniors or anyone who wants bigger print | 5×5, Easy or Medium, large print | Large print widens the squares and the gaps holding the signs together, so the signs stay easy to read. |
| Adults | 6×6 or 7×7, Hard | Large enough that pairs come up on every Hard sheet we tested at these sizes. |
| Puzzle fans | 7×7, Expert, 1 per page | Few or no numbers printed, and at least one square where a number has to be tested to a dead end. |
Why a Hard 4×4 is not always hard
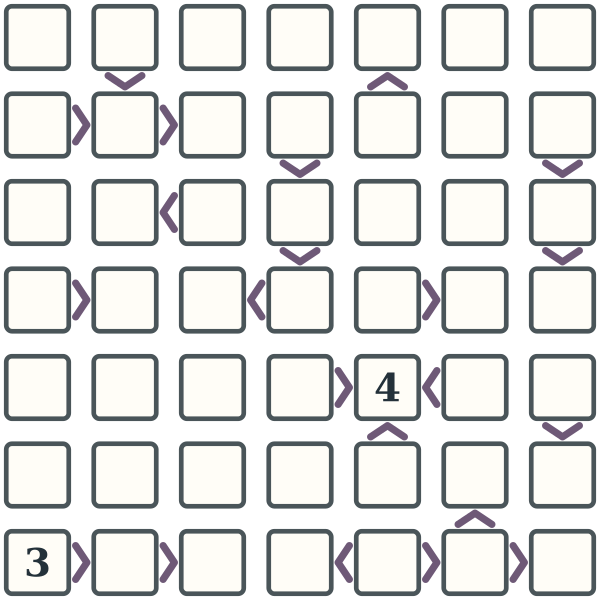
Pairs need room: two squares in a line sharing the same two numbers only help when the rest of the line is still open. On a 4×4 there is often a cheaper route, and 47% of the 4×4 sheets we asked for at Hard came back solvable with Medium moves. The builder tells you under the preview when that happens. Expert works at every size, so print that for a tough small grid.
| Grid | Numbers printed at Hard | Signs printed at Hard | Hard sheets that really need pairs |
|---|---|---|---|
| 4×4 | 0.3 of 16 | 4.9 of 24 | 53% |
| 5×5 | 0.3 of 25 | 9.9 of 40 | 97% |
| 6×6 | 1.5 of 36 | 15.2 of 60 | 100% |
| 7×7 | 2.3 of 49 | 22.9 of 84 | 100% |
36 generated Hard sheets per size, measured when this page is built.
- Answer keys come with every PDF, two to a page by default, with no sign-up. The printed numbers are grayed out on the key so you can see what was worked out.
- One per page is worth it at 7×7 or with large print. Two per page suits 4×4 and 5×5.
- Ink saving thins the square outlines but keeps the signs at full weight, because a faint sign is the one mark you cannot guess.
- The grids stop at 7×7. Some other printable sets go up to 9×9; this page does not make those yet.
- A level is about the hardest move, not the time. An Expert 5×5 that needs one test can fall faster than a Medium 7×7.
Free to print and copy
Every puzzle here is made by this site's own generator, in your browser, and checked three ways before you see it: it has exactly one answer, that answer can be reached without guessing, and no printed number or sign could be taken away. More on that in how we make puzzle packs. The terms of use let teachers, tutors, clubs and families print and copy the puzzles and the answer keys without asking.